Saturday 23 April 2011

Potato Capsicum fry

This is another spicy side dish which can be served along with rice or roti. Unlike the other fries, this will take less time as we boil/steam the potatoes (time management) before frying them.
Potato and capsicum fry

Ingredients:
Capsicum 1 – Large diced into small cubes
Potato – 3 – Medium diced into small cubes
Onion – 2 chopped into small pieces
Turmeric – 2 pinches
Coriander chopped – 1 tbsp
Mustard + Cumin – 1 tsp

For Spicy Powder
Roasted Chick pea – 2 tbsp
Grated dry coconut – 2 tbsp
Chili powder – 1 tsp
Garlic pods – 2-3
Salt
Grind them all together into coarse powder.

Method:

Steam potato cubes until they are half boiled. You can also microwave them without adding any water for 3-4 minutes by stirring in between. Heat a pan with oil. When it is hot enough add mustard + Cumin and then onion and fry for a minute. Add the steamed potato and capsicum along with some salt and turmeric. Bear in mind to add little bit salt as we are going to add the spicy powder as well which has also got some salt. Fry them on medium flame until they are done. Sprinkle some coriander and the spicy powder and toss every thing and cover the pan with lid for a minute or so until all the flavours are incorporated. Remove from the fire. Can be served with rice or roti.

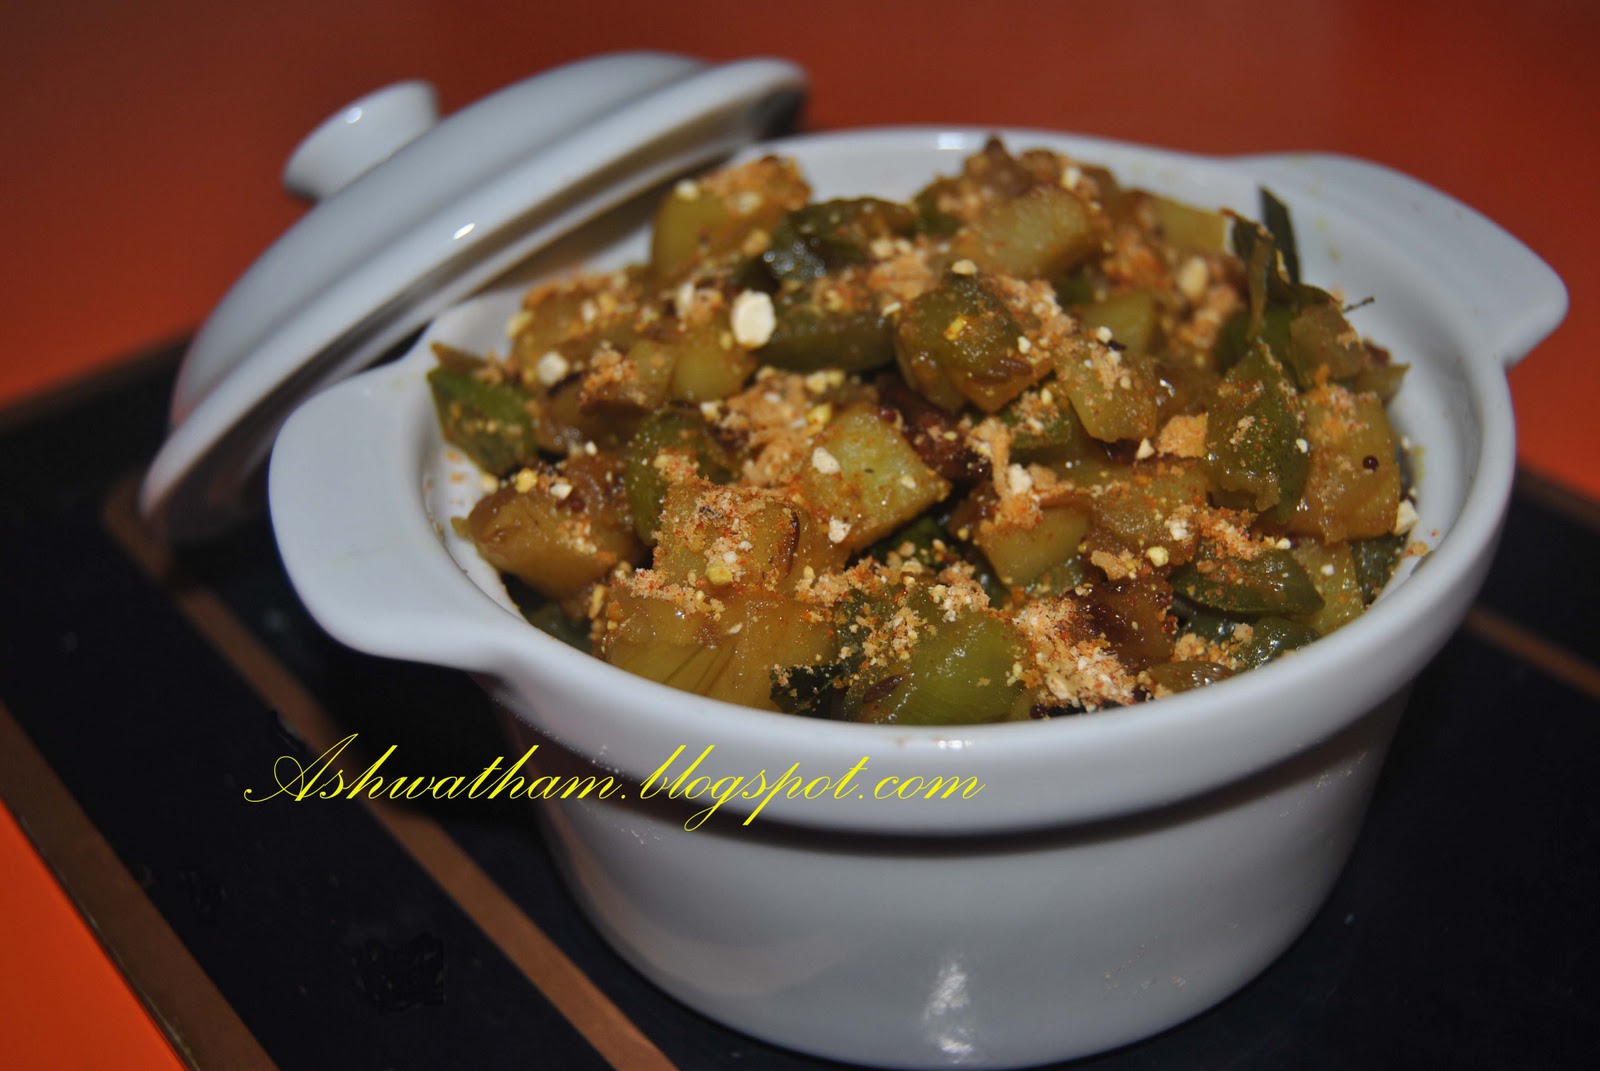
Piping hot potato capsicum fry

Wednesday 20 April 2011

Coriander Chutney - 2


 Coriander Chutney
Ingredients:
Urad Dal - 4 tsp
Chana Dal - 3 tsp
Red Chillies - 3
Green Chilli - 1
Peanuts - 1 tbsp
Coconut - 1 tbsp
Hing - a pinch
Salt
Coriander Leaves/Cilantro - 1 small bunch
Oil - 3 tsp
Tamarind - a small piece

Method:
Heat oil in a pan and add peanuts, urad dal, chana dal, red chillies, and fry till they turn brown. Keep them away.
In the same pan add coriander,green chilli, coconut,tamarind and hing and fry until the coriander becomes soft.

Cool and grind to a coarse paste by adding no more than 1 or 2 tsp water.
Mix with piping hot rice and ghee or you can even spread this on top of the toast.


Coriander Chutney on top of toast

Sunday 17 April 2011

Sajja / Bajra / Pearl Millet dosa


Among Millets Baira is the predominant crop in India. It is also called as Pearl Millet in Western Countries, it is a wholesome grain which has high nutritive value. It is usually very popular in the States of Maharashtra and Rajasthan in India. Generally people eat in winter season. It has the same quantity of protein as wheat. Bajra is rich in Iron, B vitamins, Thiamine, Riboflavin and niacin.

You can find more details in here http://en.wikipedia.org/wiki/Pearl_millet

Ingredients:

Bajra / Pearl millet / Sajjalu – 3 cups
Rice – 1 cup
Urad daal / Black gram – 1 cup
Fenugreek seeds – 1 tsp

                                                                                      Pearl millet
Method:

Soak all the above ingredients together for atleast 6 hours. Grind them all together as normal dosa batter and allow it to ferment for at least 8 hours.

Just before making dosa, stir the batter thoroughly by adding salt, and swirl the batter on the hot pan and drizzle some oil if necessary. Turn dosa on to the other side as well and cook for few seconds.

Serve them hot with any chutney.
Sajja Dosa with Peanut chutney and Roasted chickpea powder

Thursday 14 April 2011

Rava Kesari / Semolina sweet

Rava Kesari jewelled with chironji seeds

This is a very quick sweet recipe that can be prepared in 10 minutes without any hassle. Though there are numerous ways to prepare, this is a jiffy way to achieve the right taste. To bring the rich and cool appeal, I have added the yellow food colour and a spoon of vanilla essence. Because of the essence, kids do like this very much thinking that, this is another variety of ice cream.

Ingredients:
Semolina (Fine variety) – 1 cup
Sugar – 1 cup
Butter / Ghee – 3 tbsp

Vanilla essence – ½ tsp
Food colour of your choice – ½ pinch (Optional)
Chironji / Saara pappu – 2 tbsp

Method:
Heat a saucepan with butter or ghee. Add semolina and roast it under low flame. Simultaneously boil 2 ½ cups of water on the other stove. When the water reaches boiling point, add them to the semolina and stir. Increase the flame to medium heat and add vanilla essence and the food colour and mix every thing thoroughly
without any lumps and cover it with lid for 5 minutes. When the water gets absorbed completely, then add sugar and chironji seeds and mix every thing once again. Cover it with lid for 1 minute and remove from the fire.

You can serve it warm or cold. Children love this sweet because  of the vanilla flavour.
 Ready to melt

Sunday 10 April 2011

Pachi pulusu (Tamarind Rasam) – 2

This is a Hyderabad's variety with a tangy taste added with coconut and roasted chickpea flower .


Ingredients:
1 Chopped onion
2 green chillies chopped
Cumin seeds / jeera – 1 tsp
Mustard – 1 tsp
Curry leaves
Turmeric – ¼ tsp
Tamarind – a big lemon size
Chopped coriander

Method:
Soak the tamarind in hot water for about 30 minutes and extract the juice

Heat a sauce pan with 1 tblsp of oil. When it is hot enough, add curry leaves, mustard, cumin seeds and turmeric. When they start splattering, add green chilli, onion and fry until they become transparent. Pour the tamarind water into the pan. Add salt and bring it to boil. Finally add chopped corriander and remove from the fire.


Tangy pachipulusu  / Tamarind rasam ready to serve


Serve with hot rice.

Thursday 7 April 2011

Coconut Rice

This recipe is prepared at home usually the day after the festival as we break the coconut on the festival day which is handy for the following day. I follow the quick tip to extract the coconut from the shell.  keep the coconut in the freezer for at least 8 to 10 hours or until you use it. I know, many times I have noticed the fungus developing inside the kernel even if we keep it in fridge or sun dry them. I feel this is the best practice to store the coconut and keep it fresh. To use it, remove from the freezer an hour before and place it in  the water. Remove the shell and chop the coconut into thin slices and slightly pulse them in mixer or food processor with out adding any water. Make sure it should resemble the grated coconut rather than paste.

Coconut rice with brinjal curry / Guthi vankaya koora

Ingredients:
Rice – 2 cups
Fresh coconut grated – 1 cup
Green chilli – 4 - 5
Onion – 1 chopped into thin slices
Curry leaves
Coriander
Mustard + Cumin – 1 tsp
Chana daal – 1 tsp
Urad daal – 1 tsp
Cashews - 10
Dry chilli - 2
Oil – 4 tbsp
Salt
Lemon juice – 1 tbsp

Method:

Wash and soak rice in 3 ½ cups of water for 30 minutes. Cook the rice and spread in a wide plate.
Heat a pan with oil. Add the seasoning ingredients like Urad daal, Chana daal, Dry chilli, Mustard, cumin cashews and curry leaves. Add chopped onion and chilli and fry them until they become transparent. Add coconut along with salt and fry for few minutes (about 5-6) until the moisture evaporates from coconut. Finally sprinkle some chopped coriander and lemon juice. Stir once, cover the lid and turn off the heat. Add this mixture to the rice and mix every thing gently.

Monday 4 April 2011

Guthi Vankaya Koora, Stuffed Brinjal

Guthi vankaya Kura or stuffed eggplant/brinjal curry is an authentic Andhra recipe which is cooked in loads of spices along with the tamarind juice which enhances the taste of the spices. The dish can be made with either the small purple brinjals or the small round green eggplants. But you need to bear in mind that the brinjals are absolutely fresh and tender otherwise you will loose the tender taste of the curry. Simple way of checking this the brinjals will be shiny if they are fresh. I have used purple variety today.


Ingredients:

Small Brinjals - 6
Onion - 1
Tomato - 1
Sesame seeds - 1 1/2 tsp
Peanuts - 2 tbsp
Dry coconut grated - 1 tbsp
Fenugreek Seeds - 1/2 tsp
Garlic - 3-4 large cloves
Cloves - 5-6
Cinnamon - 1 small piece
Salt
Turmeric Powder - 1 pinch
Red Chilli Powder - 1/2 tsp
Cumin powder - 1/2 tsp
Coriander powder - 1 1/2 tsp
Jaggery Grated - 1/2 tsp
Tamarind Pulp - 2 tbsp
Oil - 5 tbsp
Curry leaves - 1 string


Method:

Dry roast sesame seeds, cinnamon + cloves, fenugreek seeds and peanuts seperately till they begin to change colour and leaves a nice aroma. .

Wash brinjals and make slits along the length taking care that the brinjal is held together at the stem.
Heat a tawa with 1/2 tsp of oil. Roast onions till they turn lightly brown and soften. Keep them aside. Fry tomato in the same pan by adding another 1/2 tsp of oil, until it become mushy.

Grind together roasted onion, tomato, roasted sesame seeds,  fenugreek, peanuts, cinnamon, cloves, garlic, salt, turmeric powder, red chilli powder,  Corriander powder, cumin powder, and jaggery to a very fine paste.
Stuff this masala into the slit brinjals and reserve the remaining. Heat olive oil in a kadai (wok), add curry leaves and sauté for a minute. Add the stuffed brinjals and sauté for about ten minutes. Add the reserved masala, salt and mix gently. Add tamarind pulp along with two cups of water, cover and cook over low heat till the brinjals are fully cooked and oil comes to the surface.

à°˜ుà°® à°˜ుà°® à°²ాà°¡ే à°—ుà°¤్à°¤ి à°µంà°•ాà°¯ à°•ూà°°.....
Spicy egg plant curry

Sunday 3 April 2011

Few corners at my home

Thought to share few corners of my home with you all. I always wants to decorate each and every place artistically with simple efforts. The outcome is as below.


At the entrance. The top one is the mask made up of paper and plaster of paris which I bought in kerala during our South India tour in December 2010. Middle one is the Rajasthan painting bought during North India tour in December 2009. The bottom one is face of Lorg Ganesh, again bought in Kerala. The Side hangings are made up of bronze purchased at Puttaparthi.


A wooden puppet sticked to one of the bedrooms door


Outside of the hall door. The hanging bells on both sides are from Rajasthan and the top one is from Kerala. An integration of North and South.


The other side of the door, the elephant head made up of rosewood.

In the hall. My favourite picture Yashodha with Chinni Krishna presented by lovely sister. My little one always points at this picture and says, amma that's me...


This is the fire place in the hall, which I have covered it because of the little ones. A nice red and black combination decorated with the hanging bells on the sides.

A closure look. Tajmahal gaurded by the elephants. Tajmahal and the 2 white elephants are made up of marble. Guess what, one elephant I have purchased at road side for 50 Rupees and the other one for 500 Rupees in the emporium run by the government. What a huge difference in price but not the look. The other 2 brown elephants are made up of clay. I have decorated them using some fabric paints with a touch of copper and silver colours.

Will post some other corners at some other time......enjoy

Friday 1 April 2011

Munagaaku Thalimpu / Drumstick leaves stir fry

This recipe is enriched with the unique taste of drumstick leaves with added flavour of spicy coconut powder  and toor daal.

Ingredients:
Drumstick leaves - 1 cup
Toor daal - 1/4 cup
Onion - 1 chopped into small pieces
Mustard + Cumin - 1 tsp
Red chilli - 1 or 2
Oil
Salt
For Spicy Coconut Powder
Grated coconut - 2 tbsp
Chili powder - 1 tsp
Garlic pods - 2
Grind them into powder and keep it ready.

Wash and drain the drumstick leaves. Cook the leaves until they are tender. As the leaves are bit harder than the usual greens, you can also pressure cook the drumstick leaves using just enough water. Drain the excess water and keep the boiled leaves aside.

Drumstick leaves

Seperately cook toor dall until they are just done. Drain the excess water.

Cooked Toor Daal
Heat a sauce pan with 2 tbsp of oil. Add the seasoning ingredients, stir for few seconds and add chopped onion. When the onion turns transparent, add salt, boiled toor daal and drumstick leaves and stir for few minutes until all the moisture evaporates. At the end sprinkle the coconut powder, mix every thing and remove from the fire.
 
Roti with Drumstick leaves stir fry 

Note: You don't need to throw the excess water, instead use it in mixing the roti dough or add it in curries.

Plain Chapathi

 Chapathi with Mushroom and Soya curry

Though this is a simple recipe for most of the Asians, I felt to publish this recipe as I have encountered with many ameture cooks / newly married people who asks about techniques to make soft chapathi / roti. I have used whole wheat flour in preparing this. Though few people do like the colour of  bleached / refined wheat floor, I vote for whole flour only, as the chapathis / pulkas won’t be soggy even when they are cold unlike refined floor . Not only that, lots of fiber in the whole grains which plays a vital role.

Few tips to get soft chapathis
- Do not mix the dough too hard.
- Always add sufficient amount of water in the begining itself as it is difficult to mix the dough with water in the later stage.
- Knead the dough thoroughly finishing wtih few good punches.
- Always leave the dough covered completely for atleast 15-30 minutes.
- To get rid of the sticky dough from your hands, just after kneading the dough add 1tbsp of oil to your palm and knead the dough again, so that your hand becomes dough free.
- Always heat the griddle properly before placing the chapathi.
- Do not over cook the chapathi as it becomes hard if you do so.

Ingredients:

Whole wheat flour – 1 cup
Water – 1/2 cup (Again this depends on the type of flour you use)
Salt for taste
2 tbsp flour mixed with 1 tbsp oil
 
Method:

Mix the flour and salt with water and knead it thoroughly and at the end pour 1 tbsp of oil into your palm and knead again for a minute and rest it for 30 minutes to 1 hour.

Though few people add oil in the first place itself, I prefer to add it at the end so that the dough comes off from your hands with out any hassle and also less oil is required

Now divide the dough into 4 equal parts. The easy way to do is roll the whole dough into one long roll and cut into 4 parts using knife. Quicky one…

Roll the ball into round disc and sprinkle the flour mix and fold all corners and make it a triangle as shown.


Roll it again into medium thick triangle so that we don’t press the layers too much.


Heat a griddle and place the chapatti and cook for a minute.

Bubbles are appearing

When the bubbles appear, turn the chapathi to other side and apply oil. Turn it back and apply oil again, slowly press the chapathi until it pluffs from all sides and cook until you see brown spots.
 Chapathi fluffing like poori

Serve hot with any curry.
Chapathi with spicy mushroom and soya chunks , onion and lemon